Want to make clothes so why not join a sewing group?

I haven’t made any clothes on a sewing machine for many years and really want to get back into it – especially since my partner’s mum gave me her sewing machine 🙂

Needing a little confidence boost to get started I decided to join a group at a local community centre. I can get some extra advice and avoid any obvious mistakes. It’s also nice to have other crafty people to chat to and see what they’re making!

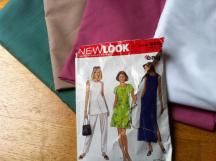
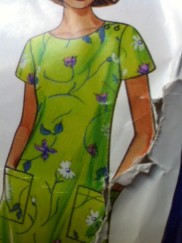
My ‘easy’ second hand pattern (no zips and I like the buttons on shoulder detail) is ready for the meeting tomorrow, along with plain (no patterns to match and cheap) polycotton and interfacing. I have checked all the relevant pattern pieces are there and using the dress pattern in the centre. I have green fabric for the main body with biege and pink for the sleeves and pockets. I love dresses with pockets!

fabric to make easy dress with pocketsmaking dress second hand easy pattern pockets

Update on growing mushrooms

Just look how much the grey oyster mushrooms have grown over the weekend!

Home grown oyster mushrooms ready to eat

Home grown oyster mushrooms ready to eat! Next to a teaspoon

grey oyster mushrooms growing

They've grown so much over the weekend

oyster mushroom rissotto home grown grey

The grey oyster mushrooms just tasted amazing in a rissotto 🙂

yellow oyster mushrooms home growing

The yellow oyster mushrooms are catching up too! I think they'll also make a tasty rissotto 🙂


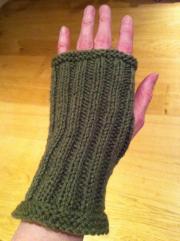
Simple ribbed fingerless gloves

Take a look at these fingerless gloves if you are making the cowl and want gloves to match or just want to start on a smaller project.  As with the cowl there are no increases or decreases and the pattern uses only the basic ‘knit’ and ‘purl’ stitches.

tutorial gloves fingerless mittens mitts hand knit beginner knittingI used 4.5mm needles and less than 50g double knit acrylic yarn.

Cast on 44 stitches.

Knit stitch for 4 rows. This is called garter stitch – a wavy texture stitch on the front and back.

Knit stitch for one row, purl stitch for next row.You now have 2 rows of stocking stitch. The smooth arrow side is the front (right side) of the stitch. The wrong side (back) of the knitting has a wavy texture.

You then move onto the main area knitted in rib stitch.

Knit 2 stitches (move yarn to front of item) then purl 2 stitches and move the yarn to the back again. Repeat these 4 stitches for the rest of the row (11 times).

Repeat this row until you have 40 rows of rib stitch. Have you noticed that the front side of a knit stitch is the same as the back side of the purl stitch and vica versa? This means by alternating them you have the same rib pattern on the front (right side) and back (wrong side). This is useful to know if you want to make reversible items or where both sides are visible.

Knit stitch for 4 rows (garter stitch).

Bind/cast off all 44 stitches.

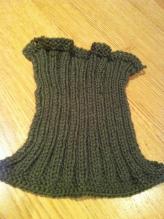
beginner tutorial hand knit rectangle glove projectYou will need to make two of these – one for each hand. They are identical.

The ‘tails’ of yarn left from where you cast on and bind/cast off will be on the left if the front side is facing you.

Fold your knitting in half lengthwise and with the front (right side) on the inside. Now you can see the wrong side, start from the top (where you cast off) and using your yarn; sew the side together for 6cm and finish.

Leave a gap of 4cm then start again, sew the rest of the edge together to the bottom (the cast on edge) and finish.

fingerless glove tutorial hand knit mitten rib rectangleTurn your ‘tube’ inside out, so the right side is now on the outside and the messier sides of the join are on the inside.

You will have realised that the different combination of knit and purl stitches make all the other stitches! You will also see that the rib stitch area stretches – very useful to create elasticated areas on items like cuffs on sleeves 🙂

If you haven’t already, you may want to make the cowl to match !

Home made soda bread and butter – mushrooms too!

I was out shopping for the usual essentials like tinned tomatoes and trifle (well sometimes you get a trifle craving!) when I spotted some double cream in the reduced section and thought why not make some butter? Ok, I had been thinking about making some for a while and it didn’t just pop into my head 😉

It’s surprisingy simple to make butter. You may have aleady had the experience of overwhipping double cream and it starts to separate and go a bit lumpy – well your half way there! Just keep whipping and you end up with a lump of butter and some liquid  (butter milk). I added some salt as I was whipping (prefering salted butter). The butter will form on the whisk, so remove it and mould into one piece with cold hands in a bowl of very cold water (squeezing out any remaining liquid and air). This can be shaped in a mould (silicone or grease paper lined) or a hand formed ball. I used the butter milk to make my favourite soda bread (from Lorraine Pascale’s book) as it doesn’t need to be left to rise so really quick and tastes great!

home made soda bread butter buttermilk

Warm homemade bread with creamy butter makes a tasty lunch

home grown grey oyster mushrooms

While I'm on the subject of food - see how big my partner Dave's grey oyster mushrooms have grown - started a kit 3 weeks ago

Knitting for beginners next stage – Ribbed cowl

After you have completed your phone cover, you may want to try something more challenging and practice the other stitch you have learnt – the purl stitch.

You will also learn that alternating between knit and purl stitch creates new textures in your knitting.

The changes in width and different textures in this knitted cowl make it look more complicated than it is. Most people learn to knit by making a scarf – this is basically a short scarf with the ends attached together. There are no increases or decreases and the pattern uses only the basic ‘knit’ and ‘purl’ stitches. It shows that adding buttons to an item (they are purely ornamental) can really make a difference!

I used 4.5mm needles and double knit acrylic yarn.

Cast on 38 stitches.

Knit stitch for 20 rows. This is called garter stitch – a wavy texture stitch on the front and back.

Knit stitch for one row, purl stitch for next row.

Repeat these two rows twice more.

You now have 6 rows of stocking stitch. The smooth arrow side is the front (right side) of the stitch. The wrong side (back) of the knitting has a wavy texture.

You then move onto the main area knitted in rib stitch.

  1. Purl 2 stitches (move yarn to back of item) then knit 2 stitches and move the yarn to the front again. Repeat these 4 stitches for the rest of the row (8 times) ending with 2 purl stitches.
  2. Knit 2 stitches (move yarn to front of item) then purl 2 stitches and move the yarn to the back again. Repeat these 4 stitches for the rest of the row (8 times) ending with 2 knit stitches.

Repeat the 2 rows above until you have 142 rows of rib stitch.

Knit stitch for one row, purl stitch for next row.

Repeat these two rows twice more (6 rows of stocking stitch)

Bind/cast off all 38 stitches.

Loop the length of knitting and sew the last stocking stitch area (where you cast off) behind (on the back of) the first set of stocking stitches. This makes the cowl shape.

You will have realised that the different combination of knit and purl stitches make all the other stitches! You will also see that the rib stitch area of knitting isn’t as wide as the garter stitch area so you have a change in shape without increasing the amount of stitches used. This creates the flared area.

hand knitted simple rib cowl purl stitch buttons

Sew the button detail onto the front of the 'flared' area (see image above), going through the rib knitting behind too

N.B. I already had two buttons – if you are going to buy some especially it might look better with three (an extra in the centre).

If you want fingerless gloves to match take a look here 🙂

Knitting for beginners first project – mobile phone cover

Congratulations! Following the tutorials you have now learnt the foundation stitches and techniques for knitting 🙂

I have written these instructions to knit a phone cover. It is an easy small project to make use of your new skills. You will practice the slip knot,casting on, knit stitch and casting off. It is rewarding as you will have a finished item quite quickly.

I have used less than 50g of double knit (dk) acrylic yarn and 4.5mm needles. This is a good thickness of yarn and needle size for beginners and usually the cheapest yarn to buy.

It has been made to fit an iPhone.

  1. Cast on 16 stitches.
  2. Knit 90 rows.
  3. Cast (bind) off.
  4. Fold the finished knitted piece in half along the longest side so the shortest sides meet at the top.
  5. Join the sides together with yarn along the long edges, leaving the short edge open for your phone.

N.B. If you want to make it for a narrower/wider phone, adjust the amount of stitches you cast on (i.e. less stitches for a narrower phone). The length is dependent on the amount of rows you knit – it needs to measure just over twice the length of the phone.

garter stitch beginner green knitted phone cover

You can personalise it further by sewing on ribbon, felt shapes or pretty buttons

Knitting for beginners – cast off

To cast off (also known as binding off) means to remove the stitches from your needle.

You do this when you have finished knitting the section of fabric you are working on. This is how to do it:

cast off knitting tutorial beginner step 1

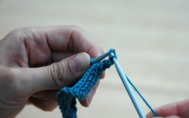
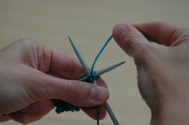
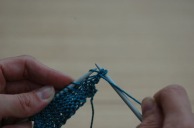
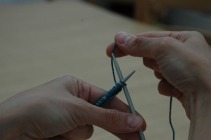
On a knit row, knit the first two stitches so that they end up on the right needle

cast off knitting beginner step 2

Push the left needle through the front of first stitch on the right needle

cast off knitting tutorial beginner step 3

Pull this stitch up and over the other stitch and then completely off the needle - the other stitch should remain on the right needle. This can be a bit fiddly, so take your time

You will end up with one stitch on the right hand needle, as shown. Knit another stitch, then repeat steps 2 to 4 until you have one stitch remaining on the right needle. The final step is to cut the yarn (leaving about 10cm attached to your knitted piece) and to thread the end through the last stitch, pull it off the needle and pull tight

Knitting for beginners – purl stitch

Once you can purl stitch you will be able to start creating some great textured patterns using the two stitches you have learnt.

Here is a step by step explanation of this common knitting stitch. As with knit stitch, hold the needle with stitches on in your left hand:

purl stitch tutorial beginner step 1

Bring the yarn to the front of your needles

purl stitch tutorial beginner step 2a

Push the right needle through the front of the first stitch and take the yarn in your right hand.

purl stitch tutorial beginner step 2b

Wrap the yarn in an anti-clockwise direction around your right needle

purl stitch tutorial beginner step 3a

Push your right needle back through the stitch

Catch this new loop of yarn with the tip of the right hand needle

purl stitch tutorial beginner step 4

Pull the top stitch up and off the left needle. Repeat the steps above for each stitch on the left hand needle

Knitting for beginners – knit stitch

So now you have learned how to cast on, how do you start creating your first piece of knitting?

The next stage is to learn the basic knitting stitch

Here are some step by step instructions to guide you on your way 🙂

knit stitch tutorial beginner step 1

Push the right hand needle through the first loop and behind the left hand needle

knit stitch tutorial step 2

Ensure the yarn is at the rear of the needles

knit stitch tutorial beginner step 2b

Wind the yarn round the rear (right hand) needle in an anti-clockwise direction

knit stitch tutorial beginner step 3

Catching the yarn with the right needle, pull a loop of the yarn through the first stitch, bringing the right needle in front of the left needle. You will end up with a loop on the right needle and all the stitches on the left needle

knit stitch tutorial step 4

Now pull only the top stitch off the left needle by pulling on the right needle

Repeat the above steps for each stitch on the left hand needle. Here is a picture of what your work will look like after knitting your first two stitches